Are you fed up with flat-looking iPhone photos? Have you always wondered how to make your iPhone photos look professional? Or perhaps you want more polished-looking selfies? Read on for an easy guide to editing photos on your iPhone!
As a photographer, having a heavy duty DSLR camera on you at all times is not always possible. My current iPhone 5S’ compact and travel-friendly size means I am able to capture things in high quality definition when I’m on the go. In 2012, I began embarking on a photographic project called ‘iPhoneography’, in which I challenged myself to shoot artistic “professional” looking photographs on my iPhone, and then edit them on photo editing apps; it’s an instant way of editing and sharing professional looking photos in real time, and an alternative to waiting until you have uploaded your photos onto a computer and processed them through Photoshop.
My secret weapons are VSCO Cam, and Afterlight. I mainly use VSCO Cam for the colour filters on my photos, as I feel they are richer in colour compared to the filters on Afterlight. However, I use Afterlight for more technical editing bits, such as rotating and straightening photos, and adding a white border to optimize my photos for my Instagram.
Below is an image I took on my iPhone whilst in Kos, Greece. As the image has good lighting (I took it in the early afternoon), I did not need to adjust the lighting; however, the colours are extremely flat, and I wanted the yellow umbrellas and blue sky to be more saturated and vibrant, so I used VSCO Cam to achieve this.

THE GUIDE

Step 1
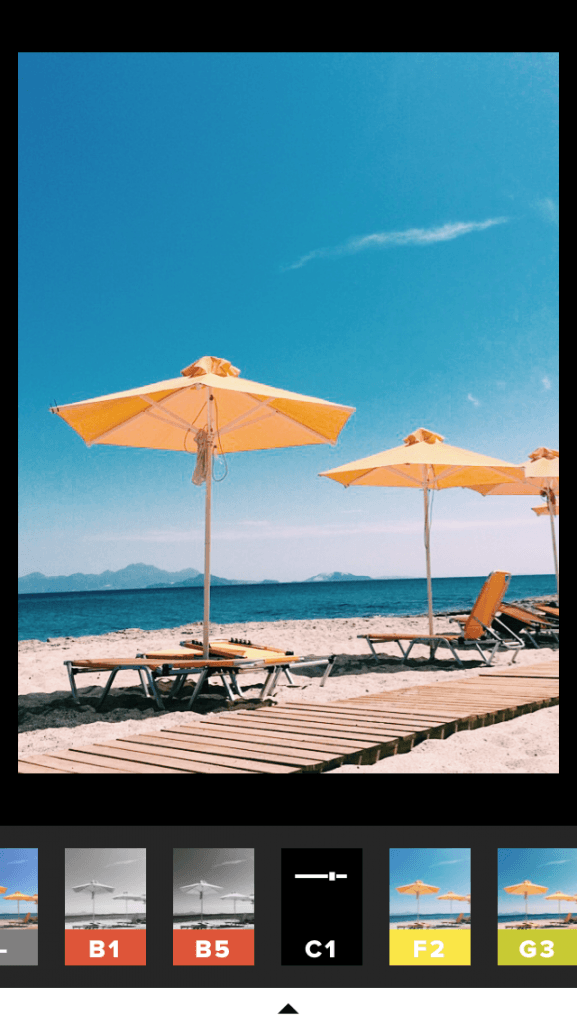
(If you haven’t already, download VSCO Cam from the App Store for 69p). Open VSCO Cam and select the image you want to edit, it will look something like this. Tap the spanner and paintbrush icon.
Step 2
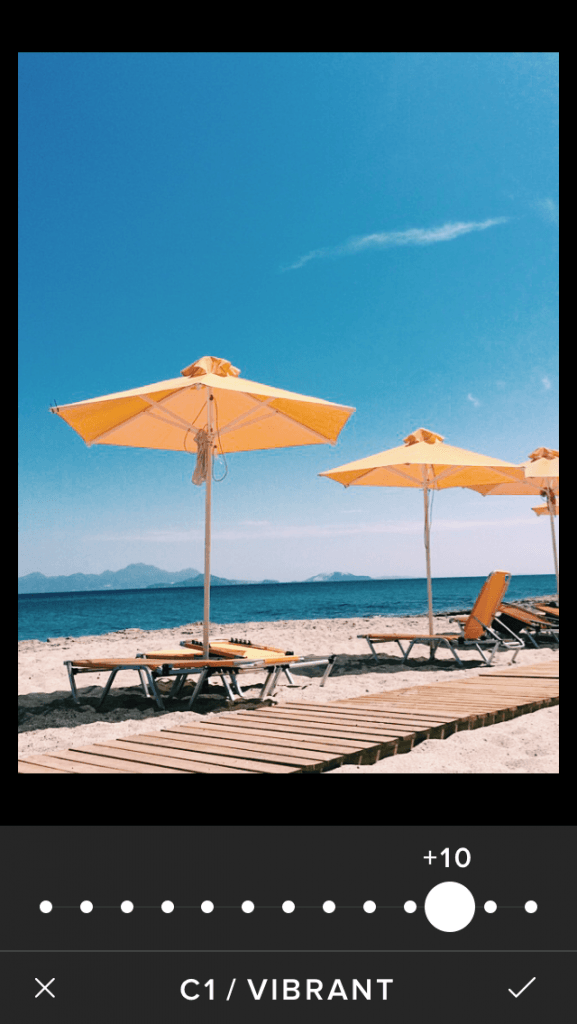
Once you’ve tapped the said icon, slide the bottom of the screen to the left and you will find a plethora of different photo filters (you can download additional filters – some paid, and some for free – from the VSCO store which is also on the app). I chose to use the C1 filter.
Step 3 (Optional)
If the filter is too intense, you can adjust its intensity by double tapping it, using the slider to adjust as desired. After this, tap the tick, and then tap the mini arrow on a white border. Proceed to tap the upward facing arrow icon to save the image. And there you have it, a more professional-looking iPhone photo! I also added a +2 sharpen for more definition, by tapping the single spanner icon, and sliding across to the triangle icon.
Now, if you’ve always wondered how to get lovely crisp borders on your images, Afterlight is great for this.
Step 1
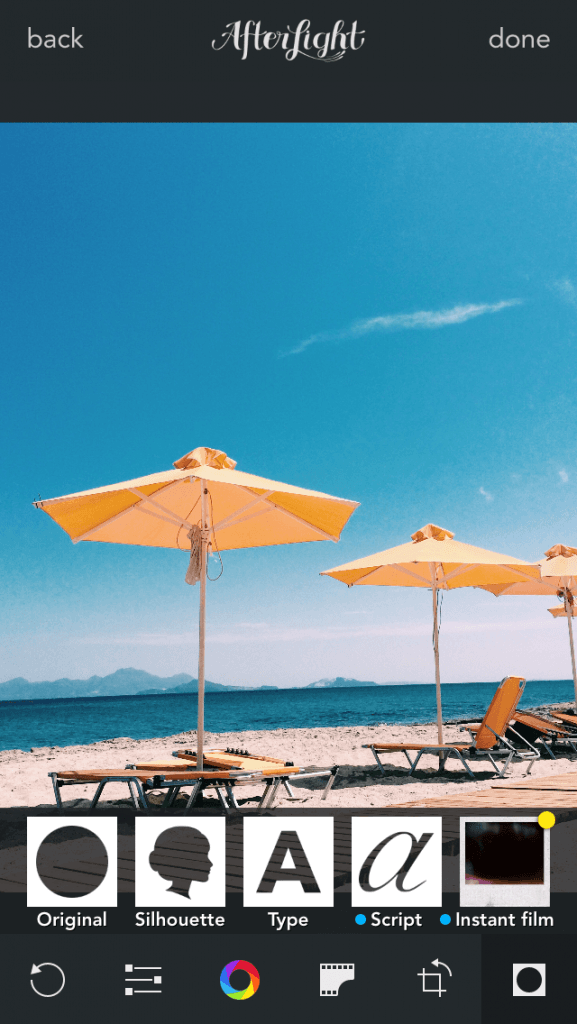
Once you have opened your image in Afterlight (also 69p from the App Store), tap the right hand icon which is a square with a circle in it.
Step 2
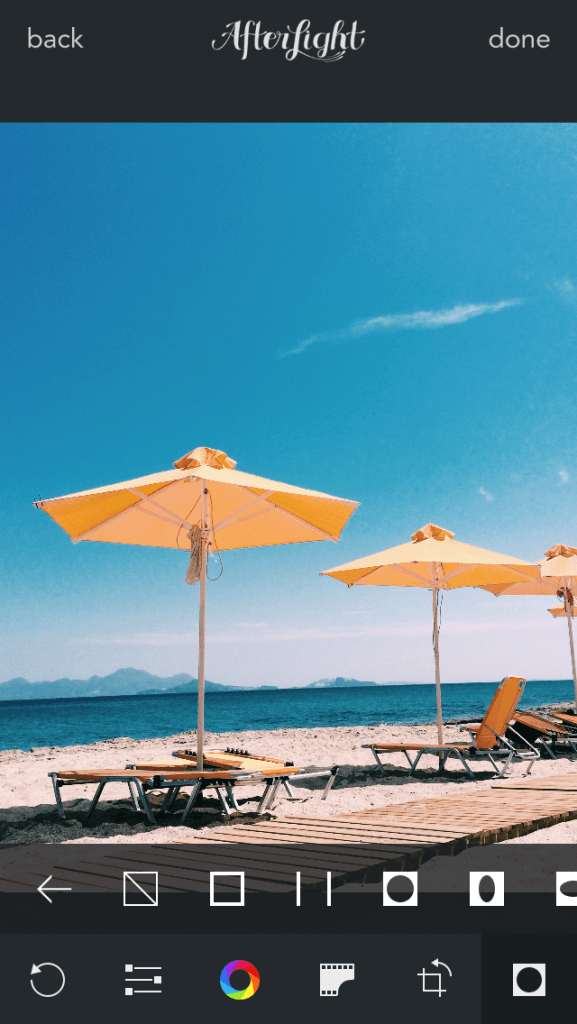
Once you have done that, you can select any shaped border you wish. I always use the border with the two vertical lines.
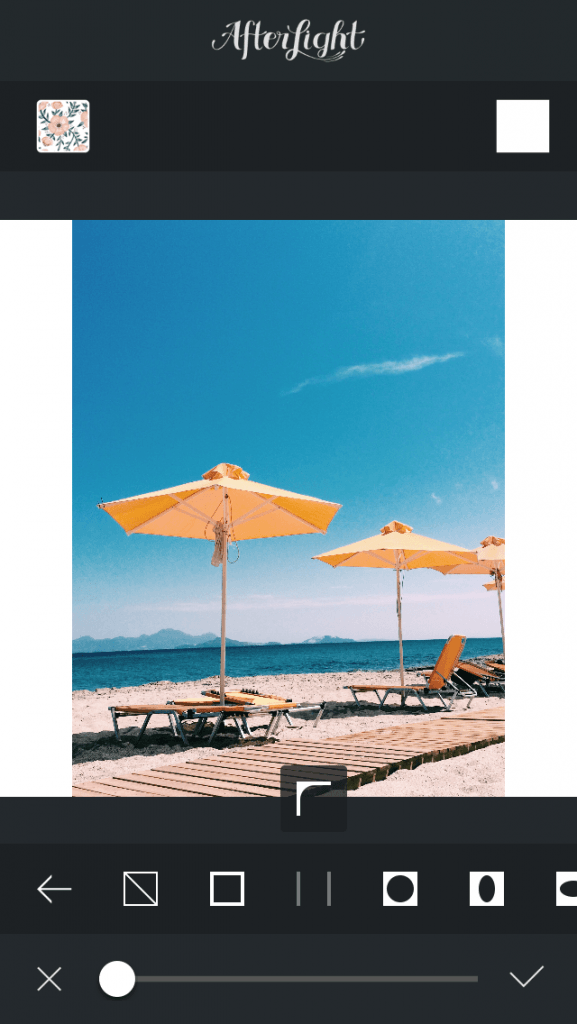
Step 3 (Optional)
Once your border is selected, you can adjust the width of it by using the slider, and tapping the tick icon to save.
And voila, here is the final result…
HANDY HINT: You can also use VSCO Cam and Afterlight to edit photos NOT taken on your iPhone. I use an app called Dropbox to open and access photos that I have on my laptop, on my phone; it thus allows me to save photos taken on other cameras onto my iPhone’s camera roll. This is a quick and efficient way to edit professionally shot photos ready for social media. This is what I did in this image I took on my Nikon D5000 using VSCO Cam and the X1 filter with a +9 intensity and a +2 sharpen:

To see more of my iPhoneography and Professional work, head over to my VSCO grid and my Instagram


